


Welcome To Hawkrown Professional
Are You Visiting As A Business Buyer (wholesaler/retailer) Or A Homeowner?
Business Buyer
Continue Here >Homeowner
Shop Retail Store >
Home / Blog Center / Chargers / Steps for Constructing Shower Room Drain Grooves
16/07/2025 | Hawkrown
In present day homes, shower rooms are an fundamental washroom office that not as it were moves forward space utilization but moreover makes the washing involvement more comfortable. The development of the shower room waste channel is an crucial step in the establishment prepare, including the plan and usage of the seepage framework to guarantee smooth water stream and viably maintain a strategic distance from spillage issues. Here are the particular development steps for the shower room seepage channel.
1. Planning of Materials and Tools
Before beginning the development of the shower room seepage channel, it is fundamental to get ready the important materials and apparatuses. Commonly utilized materials incorporate waterproof mortar, waste channels, and pre-assembled channel boards. In terms of apparatuses, commonly utilized things incorporate electric cutting machines, leveling apparatuses, trowels, and leveling disobedient. Guarantee that all materials are prepared to successfully make strides development efficiency.

2. Measuring and Marking
Accurate estimation and checking are vital some time recently starting development. To begin with, degree the position and measurements of the seepage channel based on the plan drawings of the shower room, and clearly check utilizing chalk lines. At that point, utilize a leveling apparatus to affirm the slant of the seepage channel, by and large prescribed between 1% to 2%, to guarantee that water can stream easily to the deplete outlet.

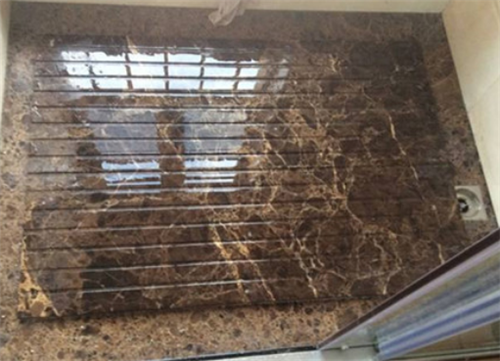
3. Cutting the Floor
Once the checking is completed, you can move on to the floor cutting organize. Utilize an electric cutting machine to cut along the checked lines, keeping the profundity by and large between 5 to 10 centimeters. Amid the cutting handle, work carefully to maintain a strategic distance from harming the encompassing floor. After completing the cutting, instantly clean up the flotsam and jetsam to encourage the following step of construction.
4. Base Treatment
After cutting, it is vital to treat the foot of the seepage channel. Utilize a trowel to clean up any tidy and flotsam and jetsam cleared out from the cutting, guaranteeing the base is clean. At that point, utilize waterproof mortar to fill and compact the foot. This step points to guarantee the smoothness of the base, encouraging the establishment of the waste pipes.

5. Introducing the Waste Pipe
Once the base treatment is completed, you can continue with the establishment of the waste pipe. Put the seepage pipe into the channel agreeing to the pre-designed shape, and secure it with mortar. Guarantee that the joints of the channels are firmly associated to dodge future spillage issues. At long last, check once more that the incline of the pipe meets the necessities to guarantee smooth water flow.
6. Fixing and Acceptance
After the waste pipe establishment is completed, fixing treatment is essential. Utilize waterproof mortar to cover the waste pipe and straighten it once more. Once the mortar dries, conduct an review to check the in general seepage impact and guarantee there are no spills. If everything is in arrange, you can continue with the consequent divider and floor tiling of the shower room.
Through the over steps, the development of the shower room seepage channel is total. Adjust development strategies not as it were upgrade the client involvement of the shower room but moreover successfully anticipate issues such as spillage, giving clients with a secure washroom environment.
Are You Visiting As A Business Buyer (wholesaler/retailer) Or A Homeowner?
Business Buyer
Continue Here >Homeowner
Shop Retail Store >